Most people underestimate pocket French doors. They look simple — two elegant panels that vanish into the wall, letting light spill freely between rooms. But get the measurements wrong by even a quarter inch, and you’re looking at doors that won’t close properly. That’s a frustrating fix on what should be a clean, satisfying project.
Here’s how to install pocket French doors the right way, from wall prep to final hardware.
What You’ll Need
Don’t start until you’ve got the right tools. This isn’t a two-screwdriver job.
Tools: tape measure, stud finder, short and long levels, circular saw or reciprocating saw, drill, hammer, pry bar, utility knife, screwdrivers, shims.
Materials: pocket door frame kit rated for French door weight, the doors themselves, track and roller hardware, a header beam, drywall, joint compound, trim, and casing.
One thing worth stressing — don’t cheap out on the track hardware. Lightweight systems simply aren’t built to hold glass-paneled doors long-term. They’ll fail.
Choosing Your Doors First
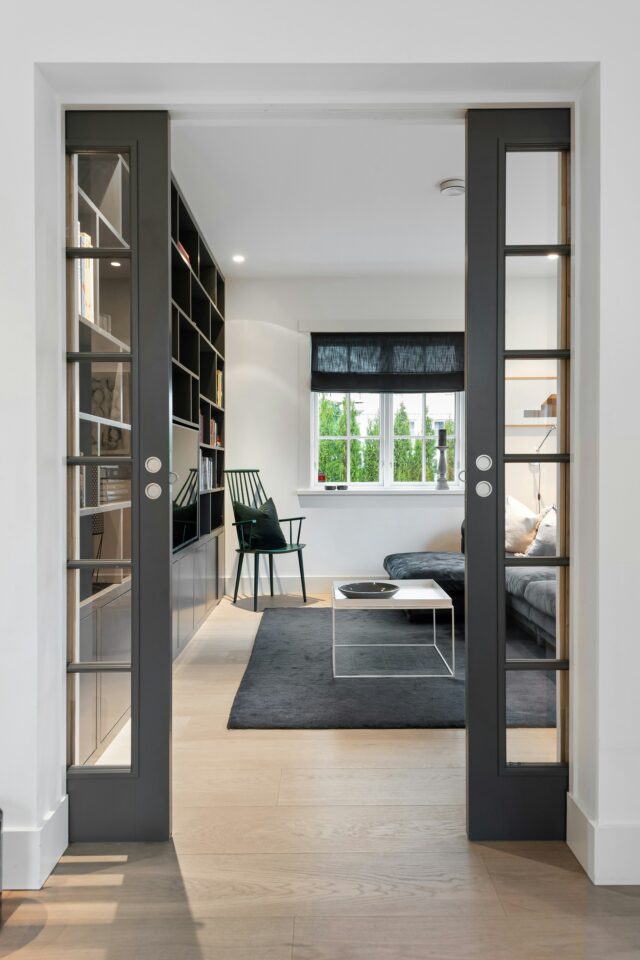
Before you touch a wall, make sure you’ve actually picked the right doors for pocket installation. Glass-paneled French doors are heavier than standard hollow-core pocket doors, so weight ratings matter. Retailers like Doors Los Angeles carry European-style pocket French doors with glass panes running most of the door’s length — both single and double panel options. In tighter rooms, a single-panel setup often creates a better feel without eating into the wall cavity on both sides.
Things to sort out before buying:
- Single or double panels
- Glass type — clear, frosted, or decorative
- Door thickness and weight
- Track and frame compatibility
- Clearance requirements (always check manufacturer specs)
Opening Up the Wall
This is where accuracy matters most. Seriously.
Step 1 — Identify the wall type. Run a stud finder across it. If the wall is load-bearing, you’ll need structural reinforcement before anything else moves forward. Don’t skip this.
Step 2 — Demo time. Pull out the old door, casing, and frame. Strip drywall from one side of the wall to expose the stud cavity.
Step 3 — Hunt for obstructions. Plumbing, electrical wiring, HVAC components — none of these can share wall space with a pocket door. If any are present, they need to be relocated first. Skipping this step is how projects stall for weeks.
Installing the Frame
The pocket frame creates the hidden cavity, and it has to go in perfectly.
Step 4 — Install the header. It must be dead level. Even slight deviations cause doors to drift or bind.
Step 5 — Set the vertical studs. The uprights that form the cavity walls need to be plumb and evenly spaced — they’ll support your drywall later.
Step 6 — Attach the track beneath the header. Check the level again across the full width. This step isn’t one to rush.
Hanging the Doors
Once the frame is solid, installation moves quickly.
Step 7 — Attach the roller hardware to the top of each door panel, following the manufacturer’s spacing specs exactly.
Step 8 — Lift the doors onto the track. French doors are heavy — get a second person for this. Seriously, don’t try to muscle it solo.
Step 9 — Dial in the alignment. Use the built-in adjustment mechanisms to level each door and create even gaps at the edges when closed.
Here’s a tip most guides skip: if doors are too tight, remove 1/8 inch from each edge rather than cutting a full 1/4 inch from one side. It preserves symmetry. A circular saw with a straightedge and fine-tooth blade works well here — score the cut line first to avoid tear-out. Always dry-fit before the final hang.
Closing the Wall and Finishing
Now the rough framing becomes an actual wall. Install drywall over the pocket frame, align seams carefully, keep edges flush. Tape, mud, sand. Get it smooth enough that it looks like it was always there.
Then add trim and casing around the opening, install floor guides and door stops. This is where the project starts to actually look finished — not just functional, but intentional.
Hardware: Handles and Locks
Because the doors slide into a wall cavity, anything that protrudes will interfere. Flush pull handles are the standard choice — they keep clean lines and don’t snag on the pocket opening. Add privacy locks wherever needed (bathrooms, bedrooms).
Pay attention to placement relative to glass panes and door edges. Test everything before calling it done.
Keeping Them Running Well
Pocket French doors don’t need much upkeep, but a little goes a long way:
- Clean the tracks periodically — dust and debris cause friction
- Inspect rollers once a year
- Don’t let doors slam hard into the pocket
- Use non-abrasive cleaners on glass panels
Smooth, quiet operation is the sign of a well-installed system.
A Quick History Note
French doors trace back to 17th-century France, when architects began extending tall window casements all the way to the floor — bringing natural light into interiors long before electricity existed. The idea was to blur the line between inside and outside, connecting rooms to gardens and courtyards. Modern pocket French doors carry that same logic forward, just with the added bonus of disappearing into the wall entirely.
As explained in architectural history, “Glazed doors, dating from the 17th century, first appeared as window casements extended to the floor.” This allowed sunlight to flood interior spaces, making it easier to navigate and connect rooms naturally.
When installed correctly, pocket French doors don’t just look good — they change how a space feels. Rooms open up. Light moves differently. The transition between spaces becomes something you actually notice. That’s the payoff for getting every measurement right.